
Configuring Custom DNS for GitHub Pages Using Amazon Route 53
Let’s configure custom DNS
In my efforts to share knowledge about tech things, setting up a blog seemed like one of the easier things to do. It is a challenge that is relatively easy to accomplish using tools which are freely available.
This site uses GitHub Pages and an underlying Ruby gem called jekyll to generate the site code. GitHub Pages serves your blog site via a repository which by default uses **
Configuring GitHub Pages to use a custom domain has a few steps.
- Add a Validated Domain to GitHub
- Add a TXT record to Route 53
- Verify the domain in GitHub
- Add a CNAME record in Route 53
- Configure the GitHub Pages repository to use a custom domain
Let’s get started!
Part 1: Adding a Validated Domain to GitHub
In order to use a custom domain with GitHub Pages, a domain needs to be added and validated in our profile.
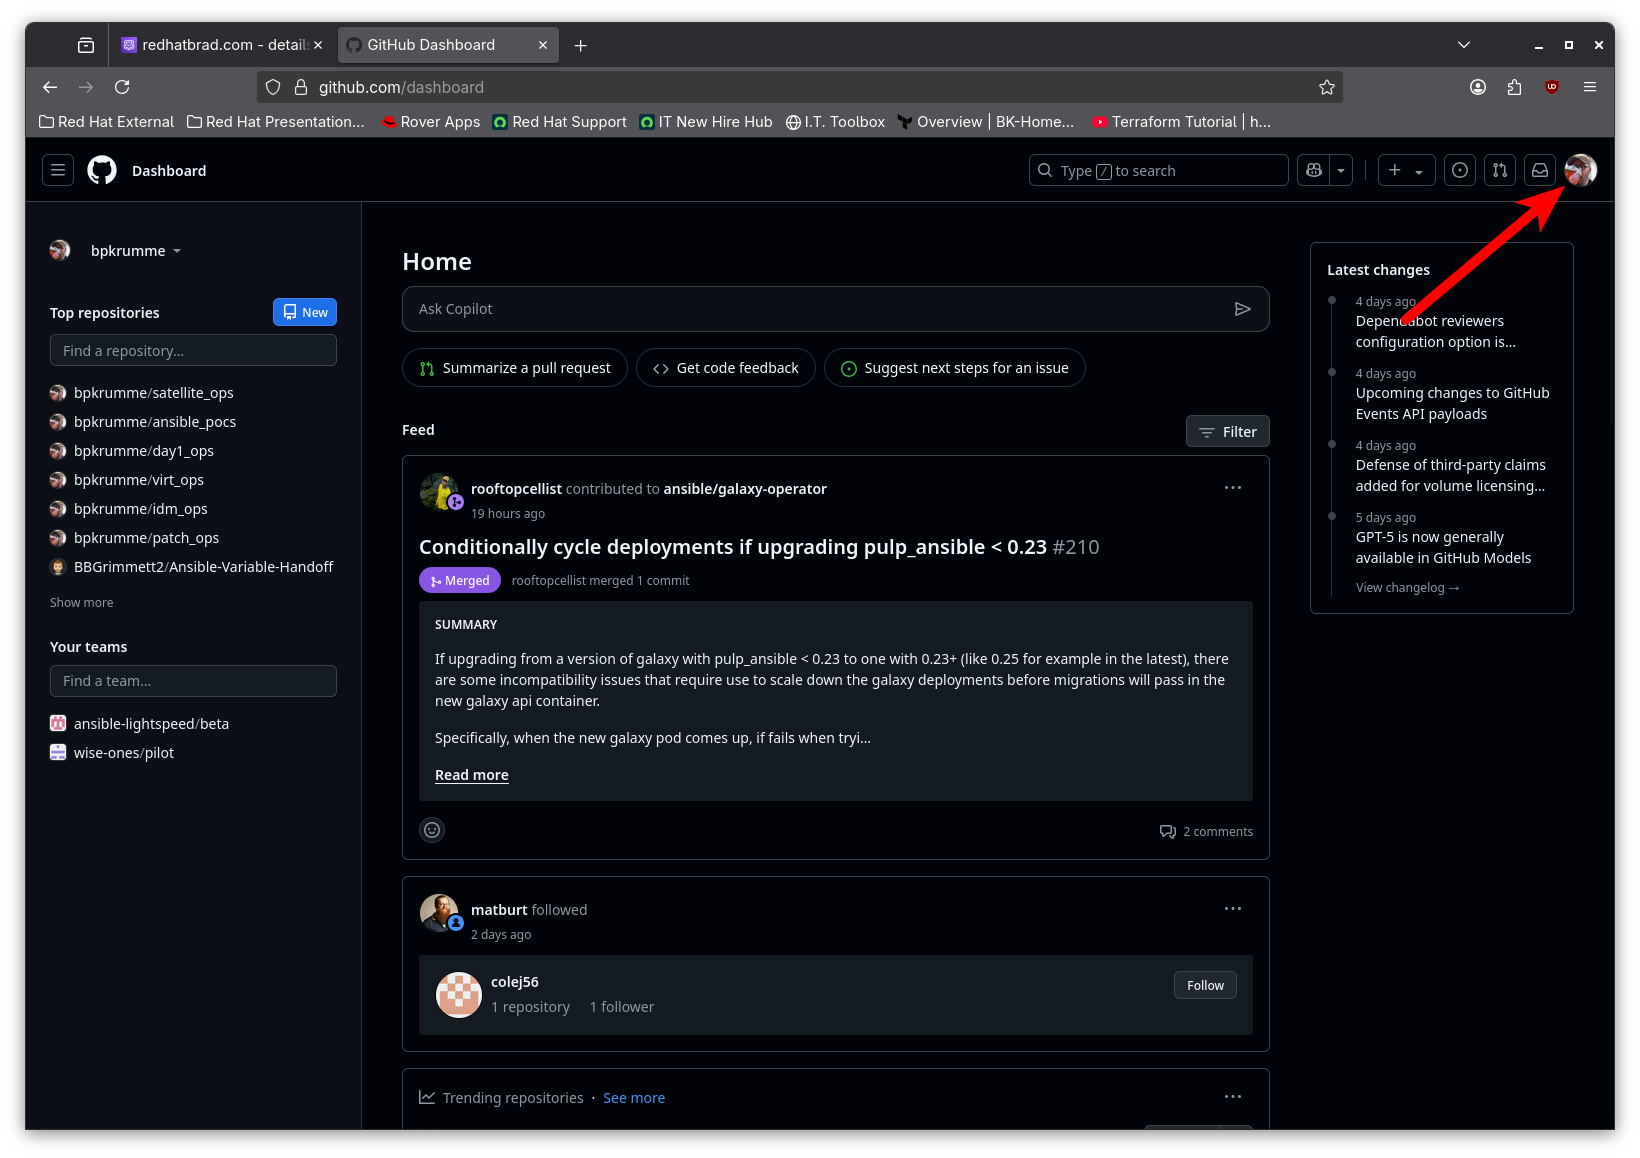
First things first, we log into GitHub. Then, from any page on GitHub, click on the profile photo.
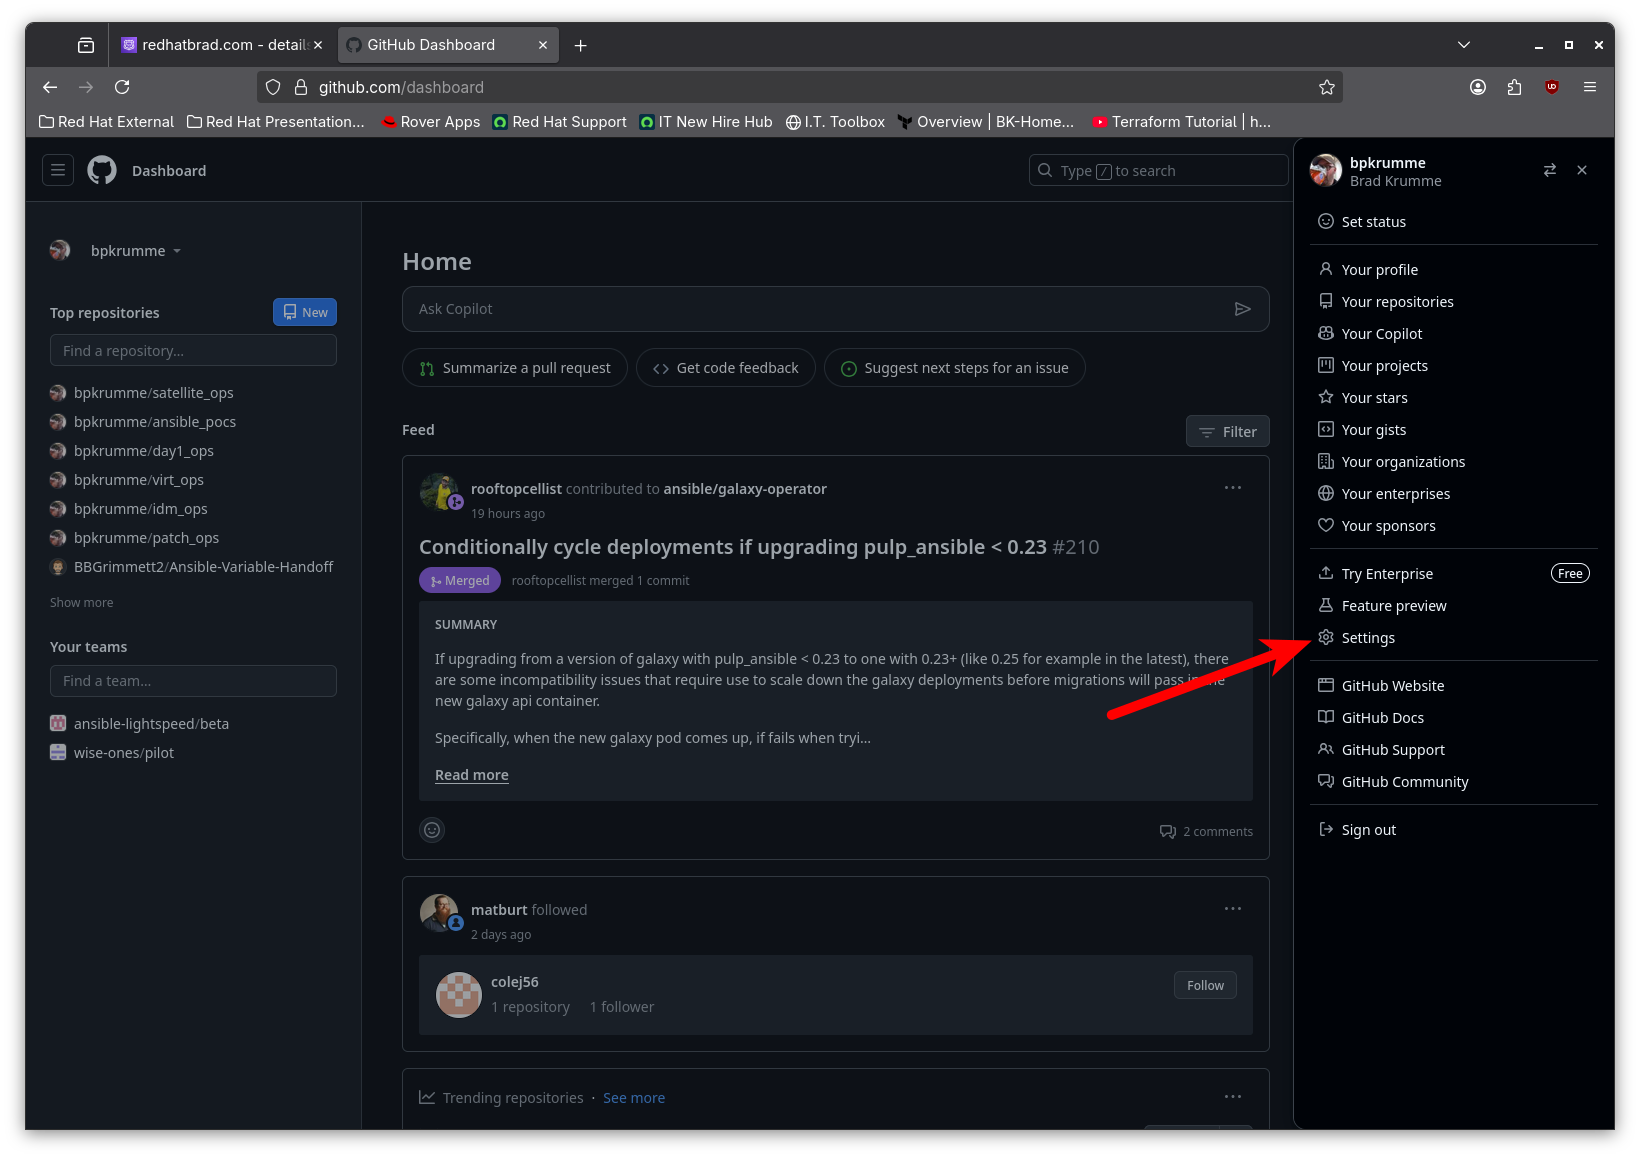
Then click on Settings which has a gear icon.
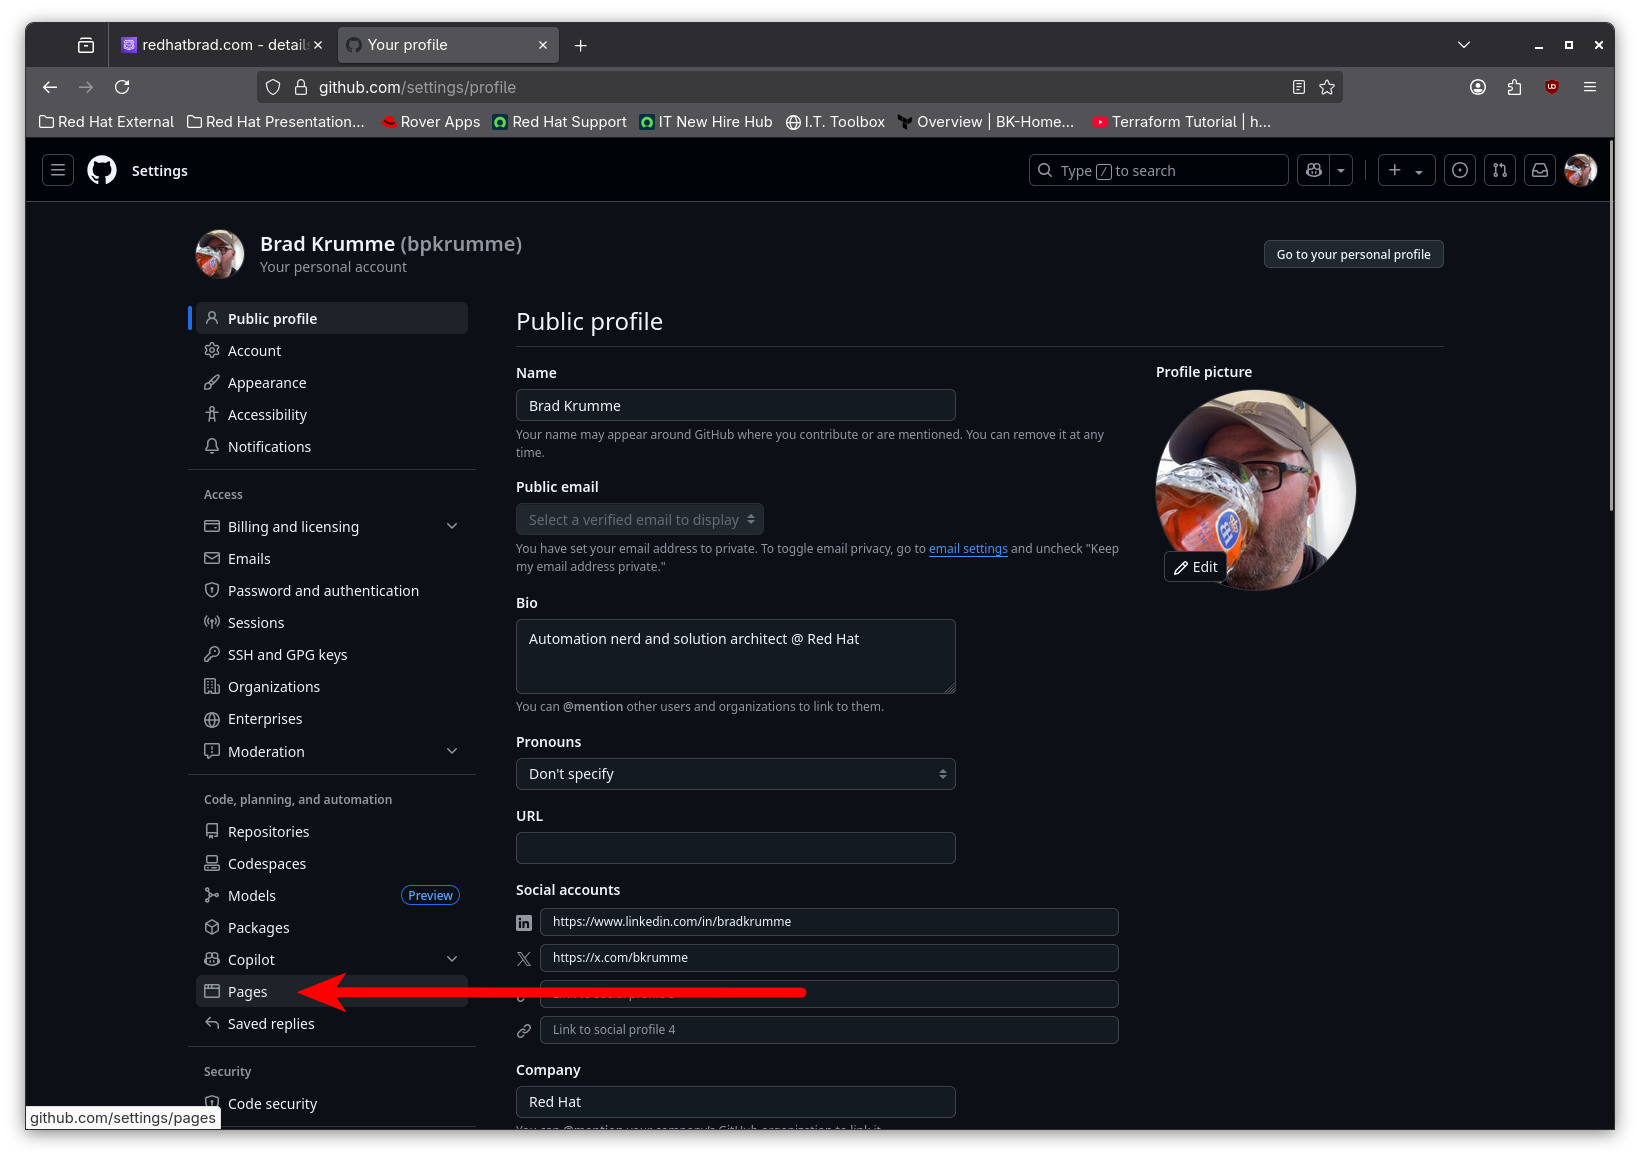
Then click on Pages in the Code, planning, and automation section.
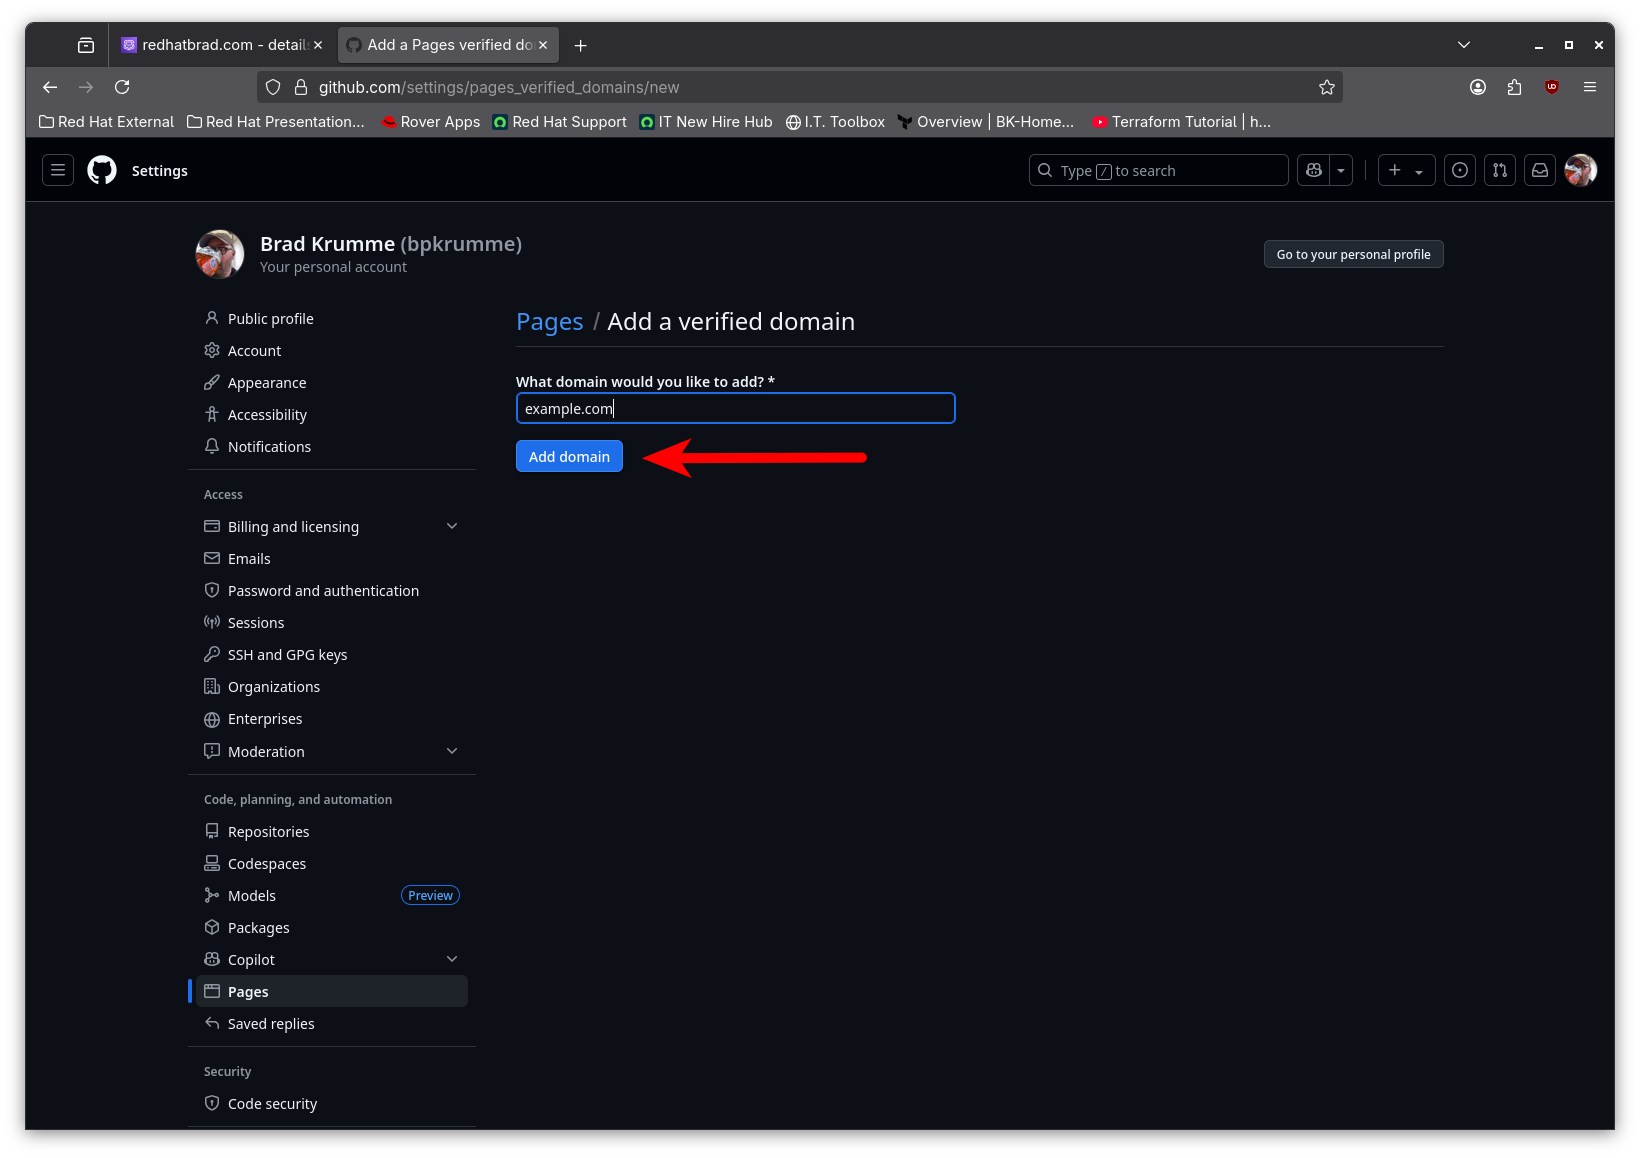
Next, click the Add a domain button to add a domain which you will verify.
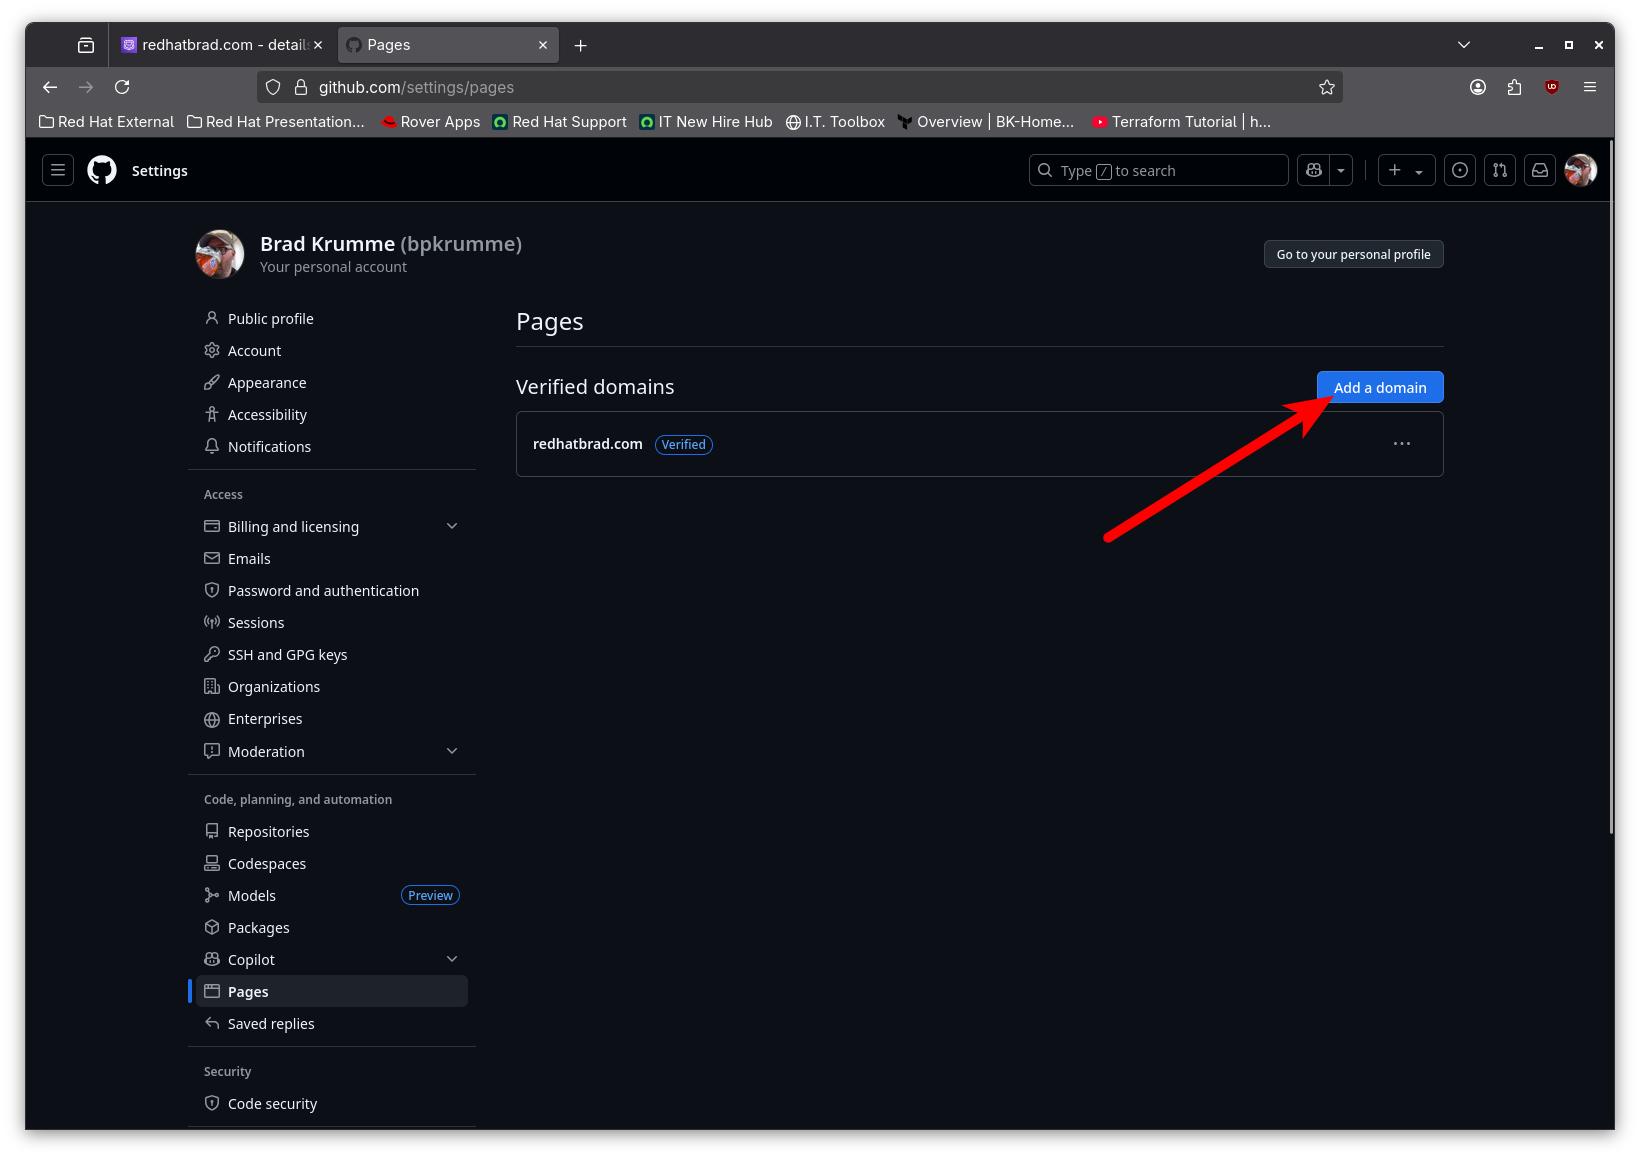
Here, we should enter the apex domain which we want to use for our site. The example here shows example.com, but this should be the actual domain. Once the domain name has been entered, click the “Add domain” button.
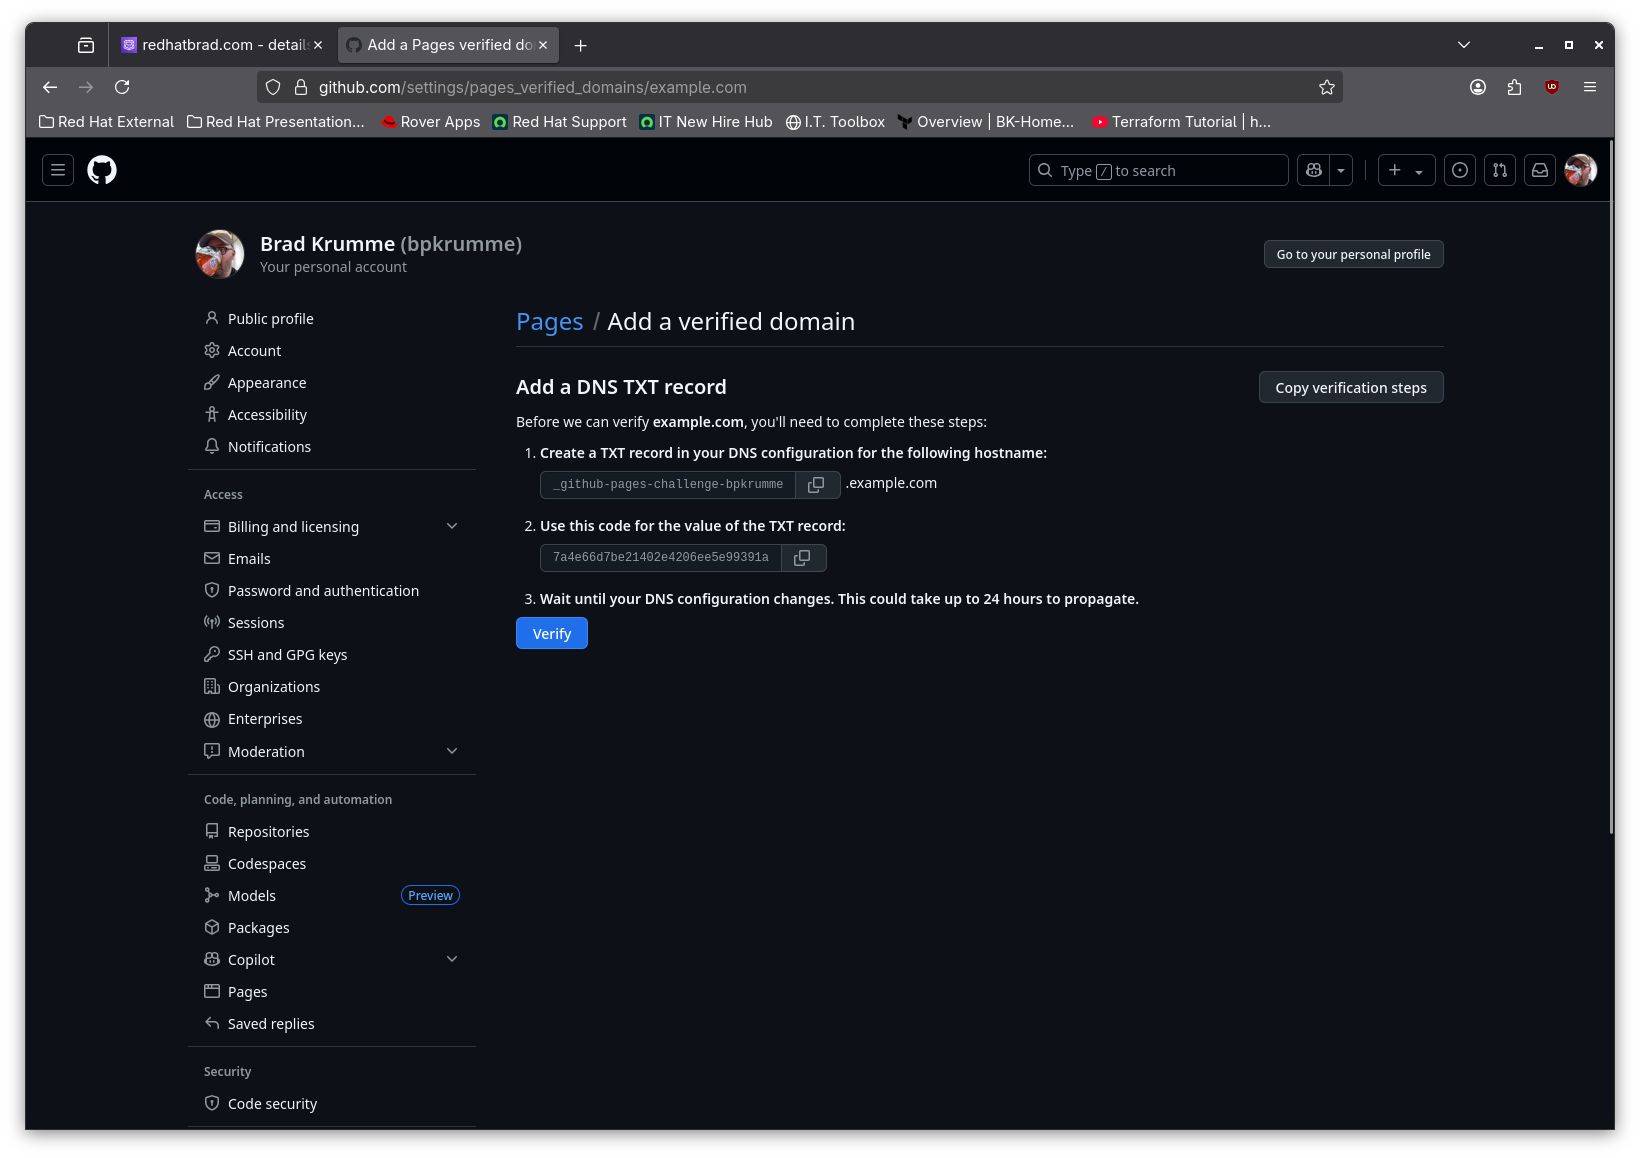
This will present an instruction page which includes the TXT record we need to add to DNS as well as the value which is required for the TXT record. Keep this page open so we can refer to the instructions and so we can quickly return to verify the domain once the TXT record is in place.
Part 2: Adding the TXT record to Route 53
A TXT record is used to store text-based information which is associated with a domain name. This could be human-readable or machine-readable information. TXT records are commonly used for email authentication and domain verification. For our purposes, the TXT record we are adding is being used for domain verification. If you’re familiar with DNS services, adding records should be straightforward. This is how to add the record to Route 53.
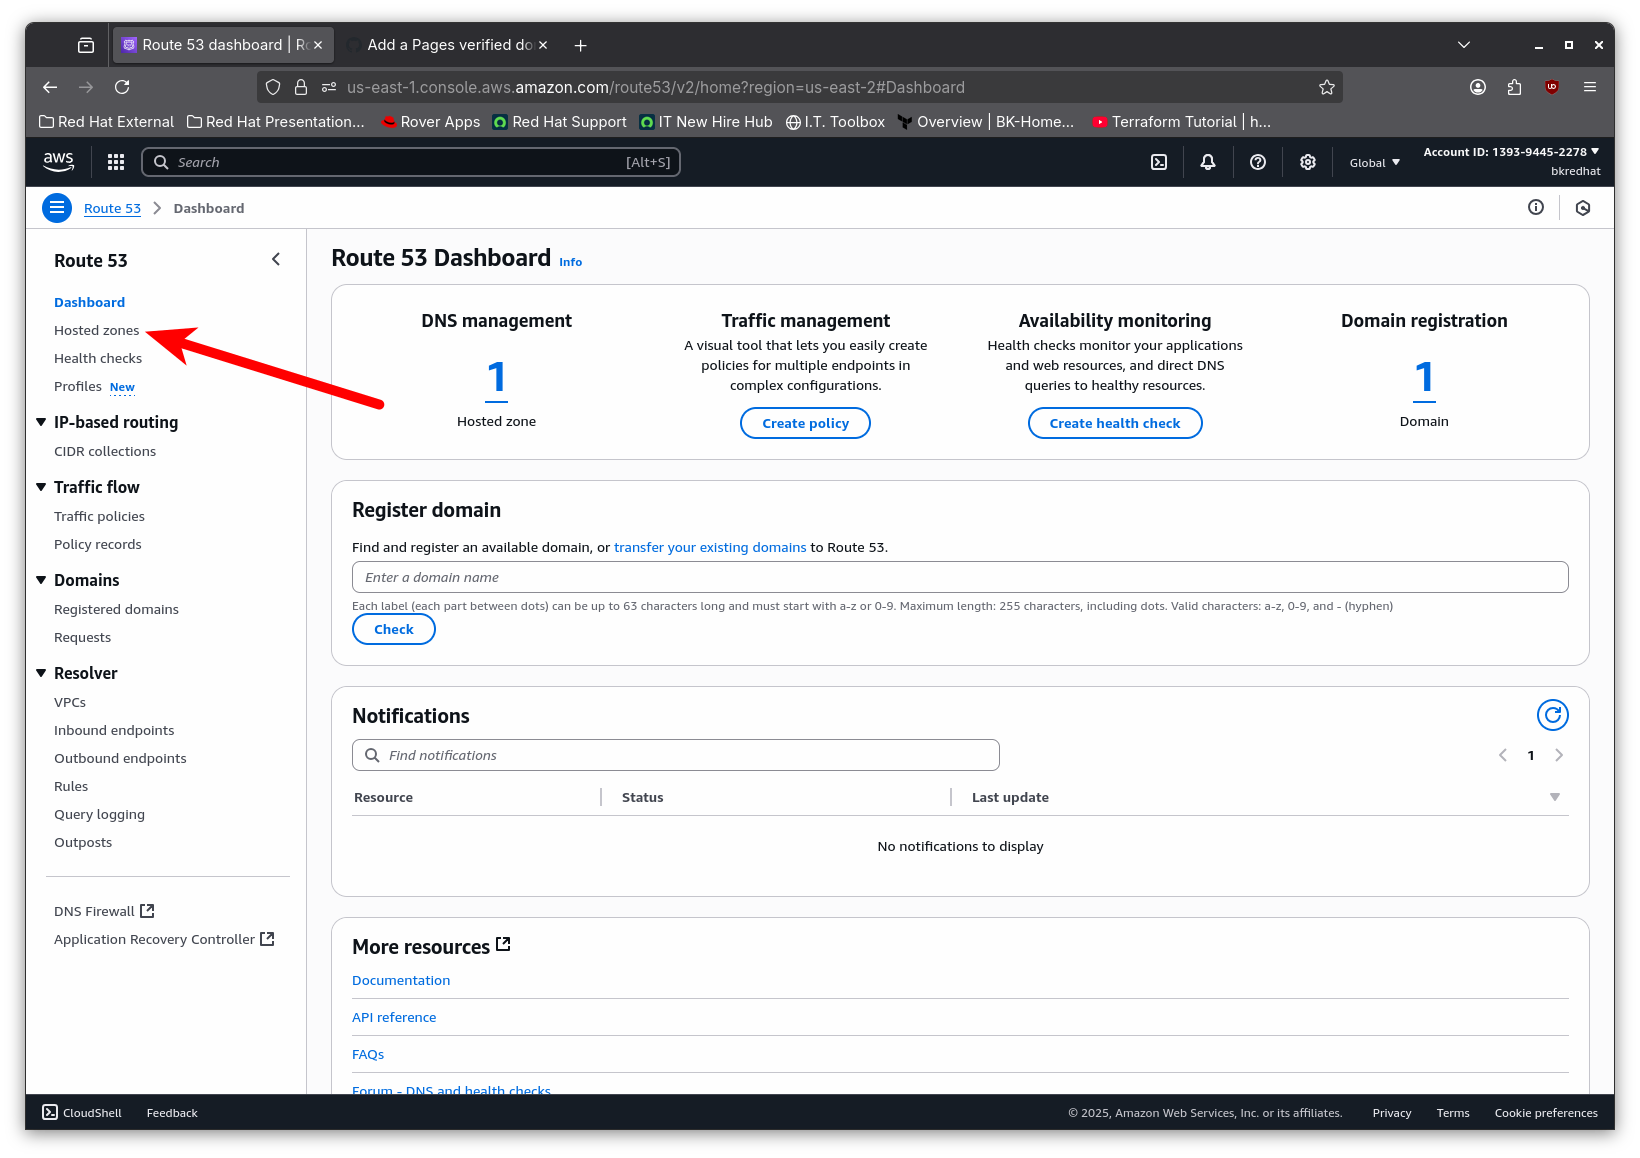
First, we log into AWS and navigate to the Route 53 Dashboard. It is possible to quickly navigate to Route 53 by using the search bar at the top of the AWS Console.
From the Route 53 Dashboard, click the menu link for Hosted zones
This will take us to a list of our hosted zones. Select the hosted zone for the domain we need to add the TXT record to. Click on the name of the hosted zone.
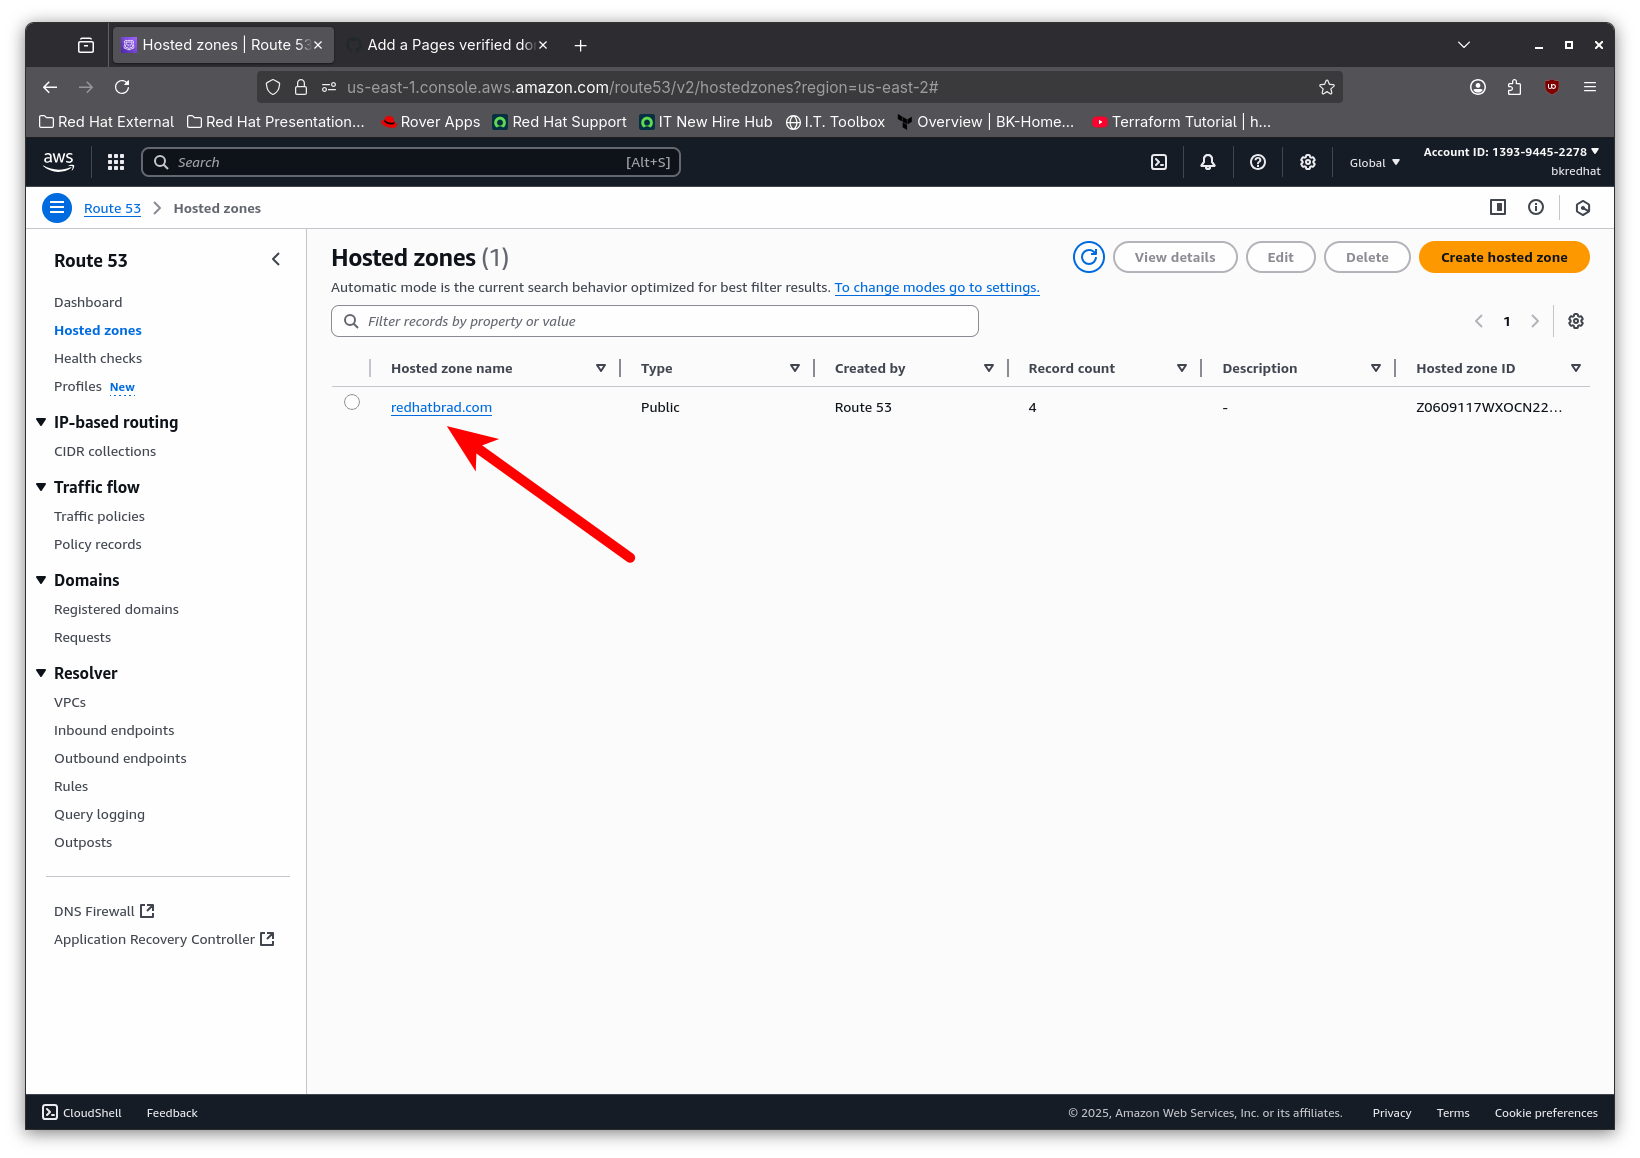
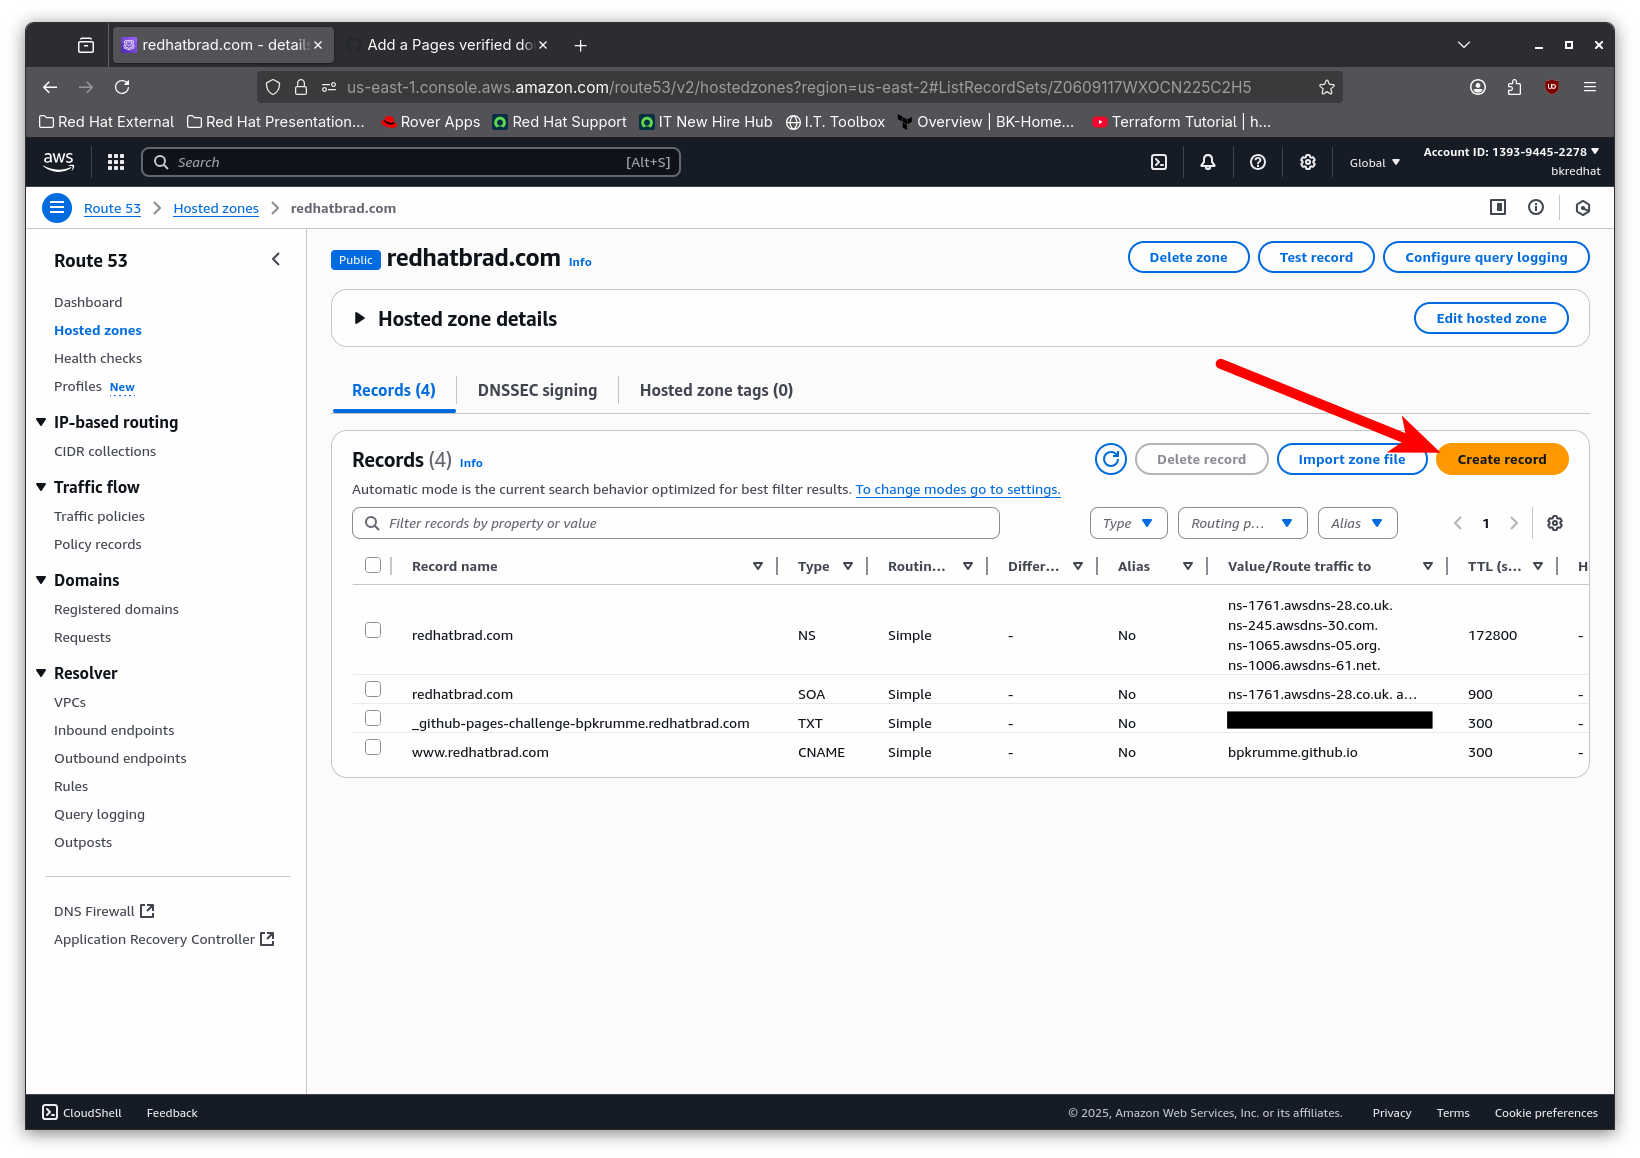
This takes us to the details for that hosted zone, where we can view the existing records and add new records as necessary. Click the “Create record” button to create a new DNS record.
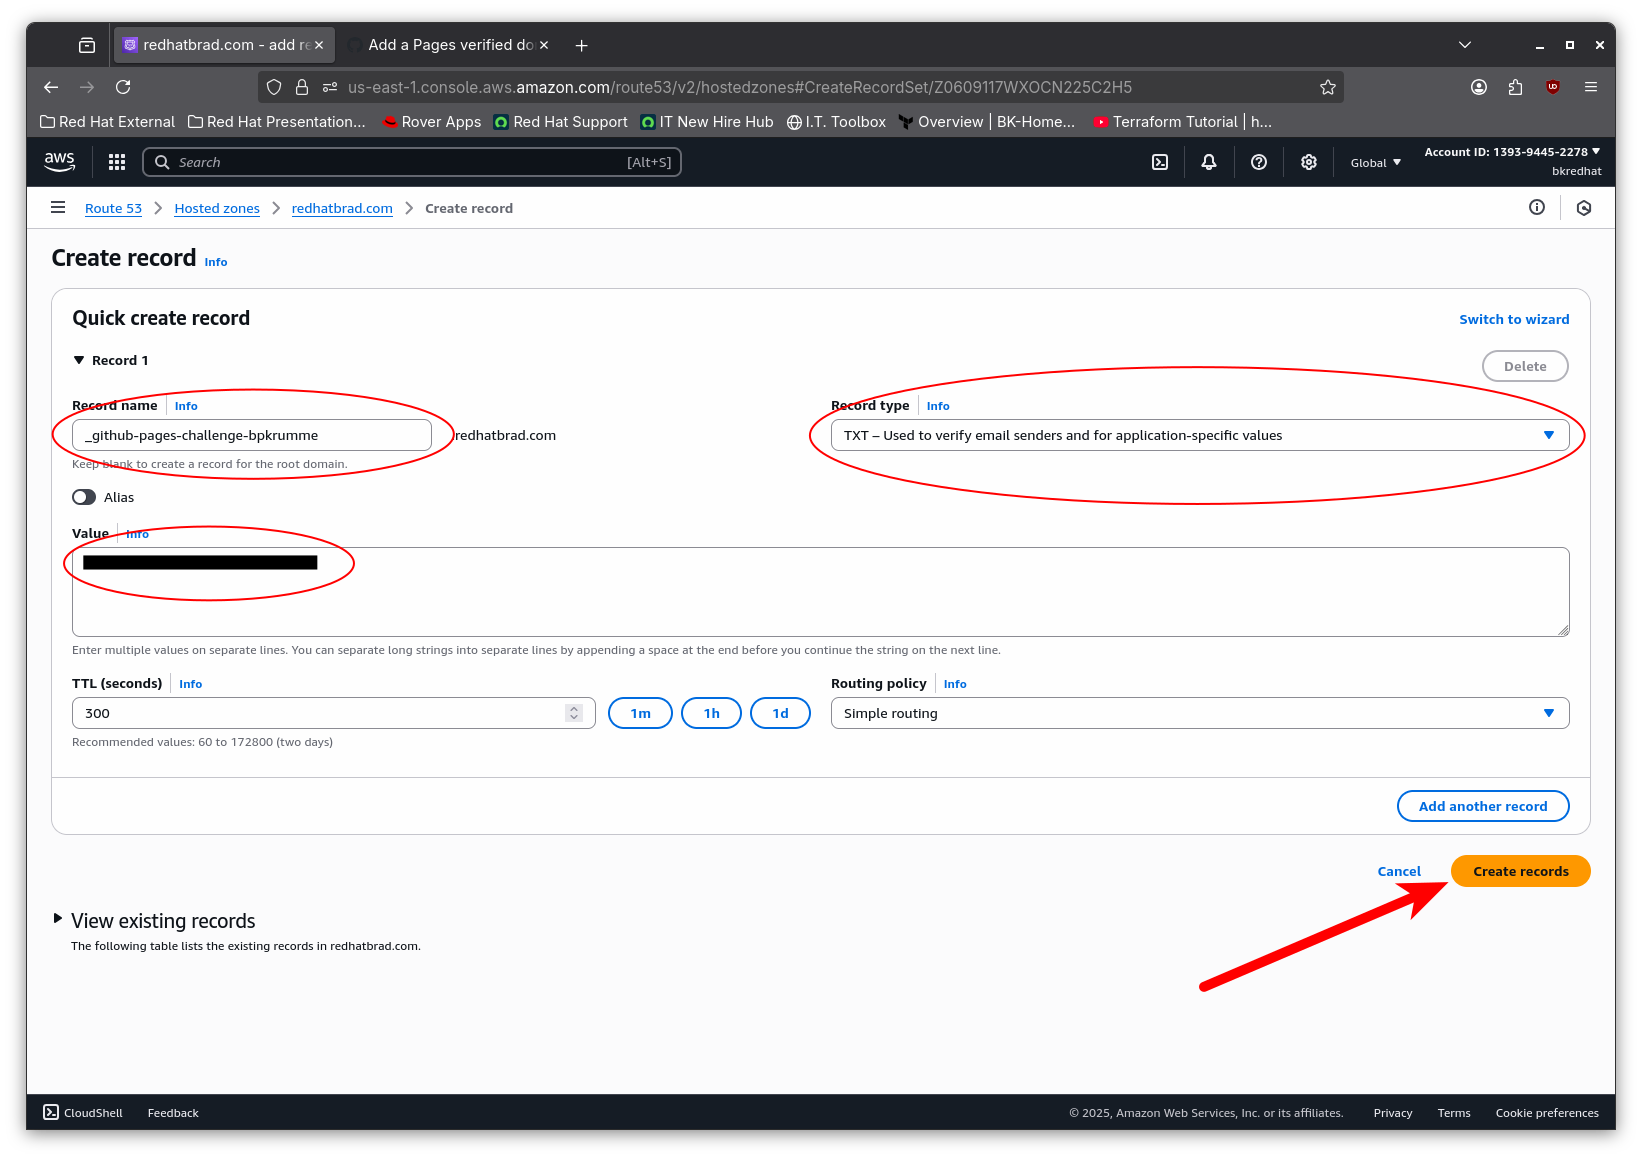
Creating a new record is quite simple in Route 53.
- Enter the Record name from the GitHub domain verification page
- Select the TXT Record type
- Enter the Value from the GitHub domain verification page
- Click the Create record button
Once our TXT record has been added, we will need to ensure that the record is propagated. Route 53 is fast about DNS propagation and claims a 60 second timeframe, so this should happen relatively quickly. To check, we can use the following command from a Linux, MacOS, or WSL instance where the dig utility is available.
dig <TXT record FQDN> +nostats +nocomments +nocmd TXT
This should provide a result which looks similar to this:

Part 3: Verify the domain in GitHub
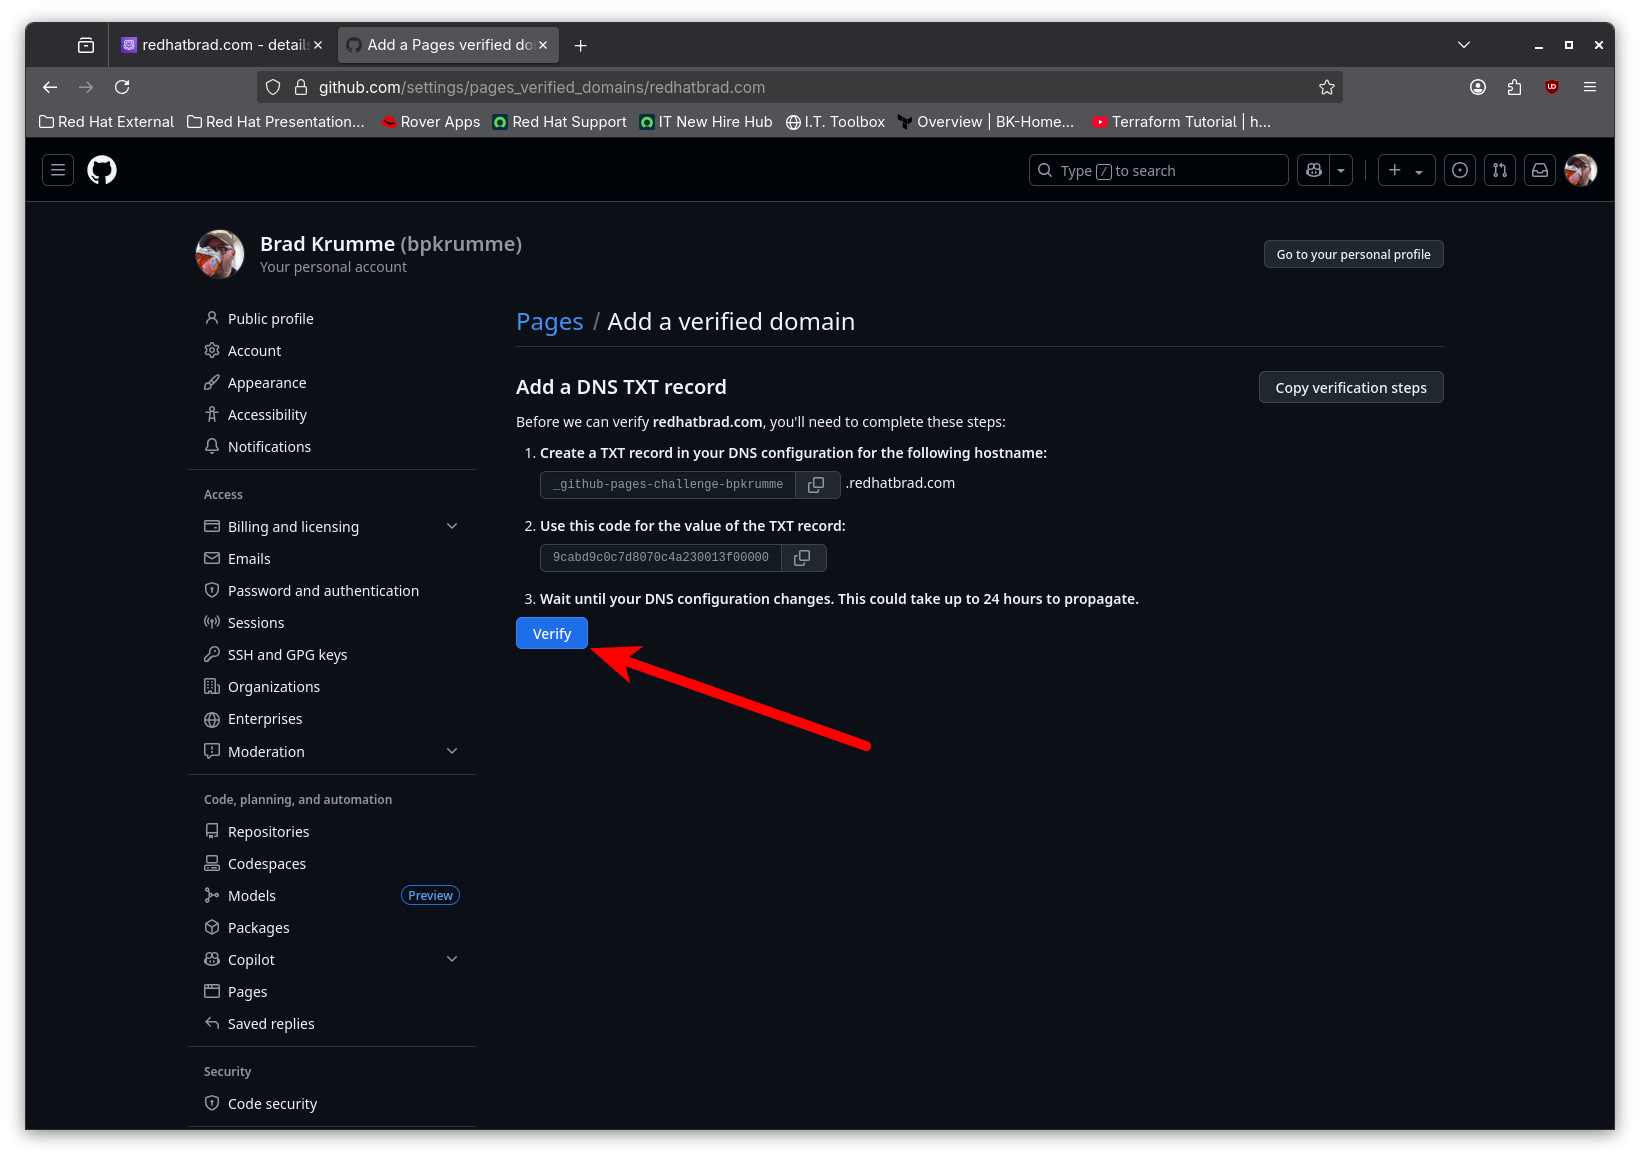
Now that we have created the necessary TXT record, we can go back to GitHub and verify our domain.
Return to the page with the DNS TXT record instructions and click on the Verify button.
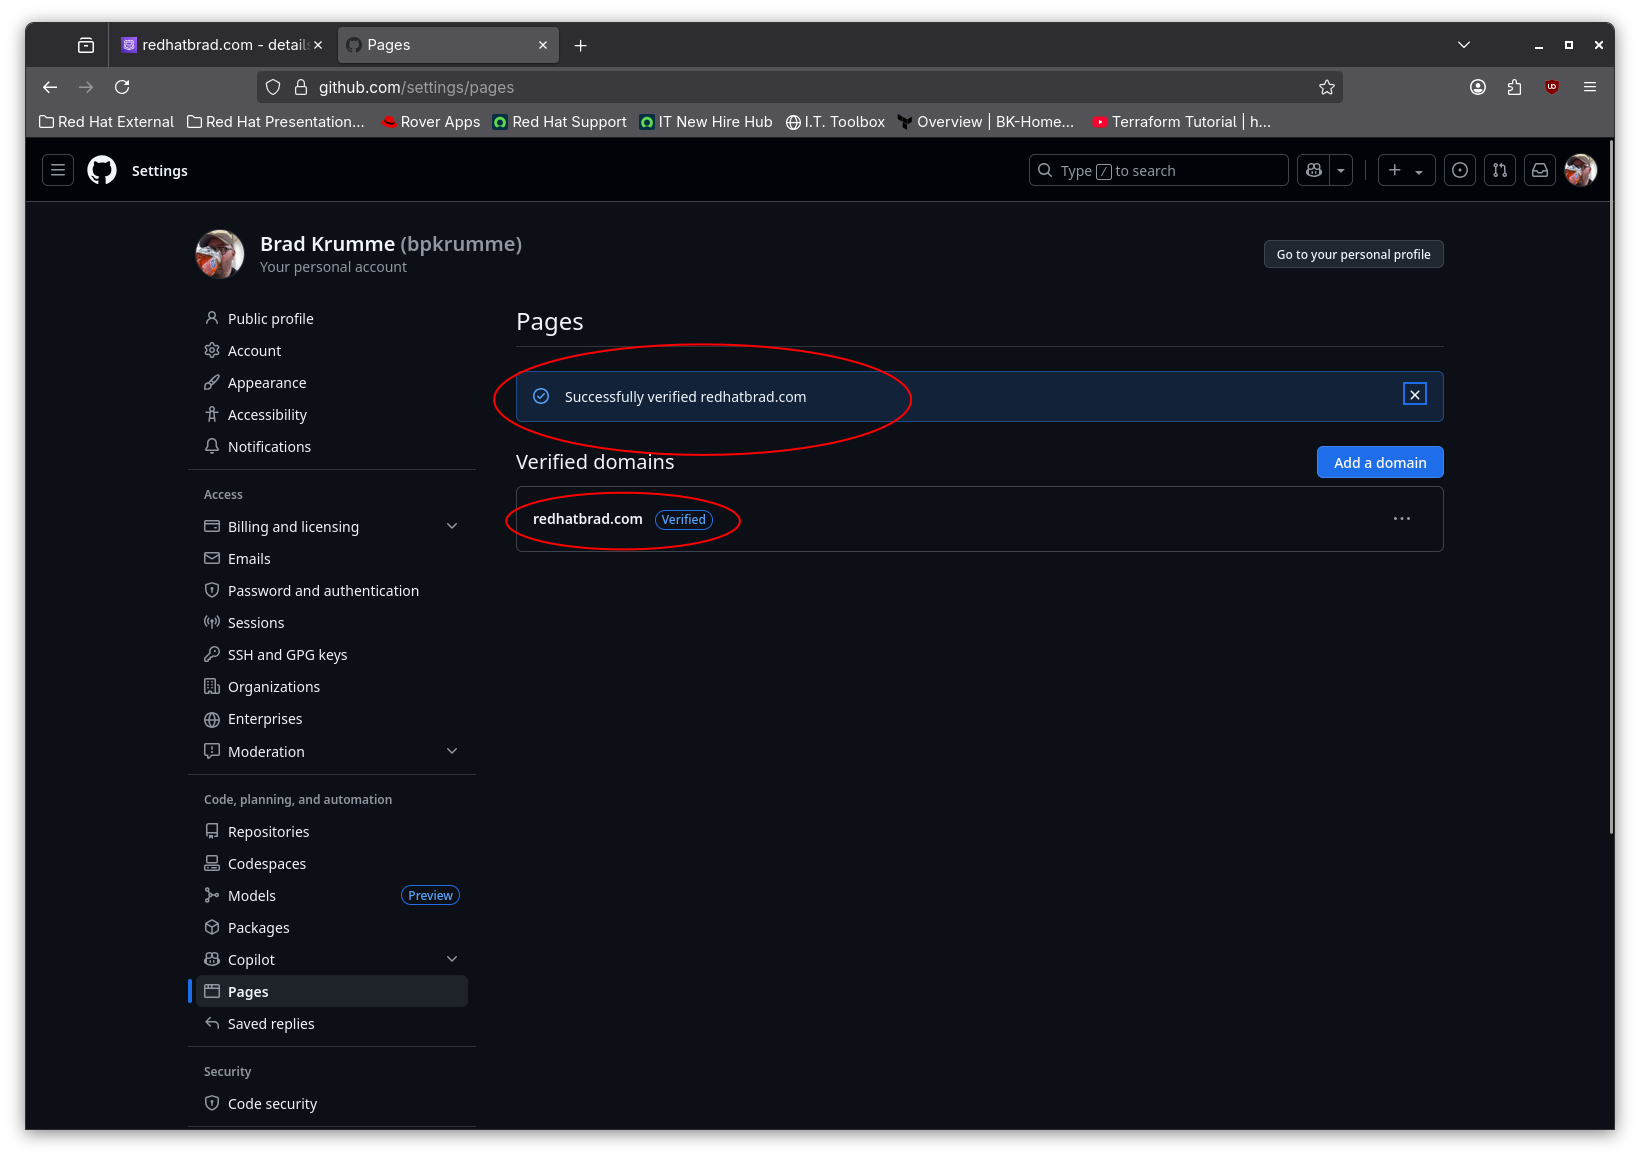
This should result in successful verification of our domain!
Part 4: Add a CNAME record to Route 53
Now that we have successfully added and verified our custom domain for GitHub Pages, we need to configure the subdomain for our site. This could be any subdomain that we like, however for our purposes the www subdomain will do nicely.
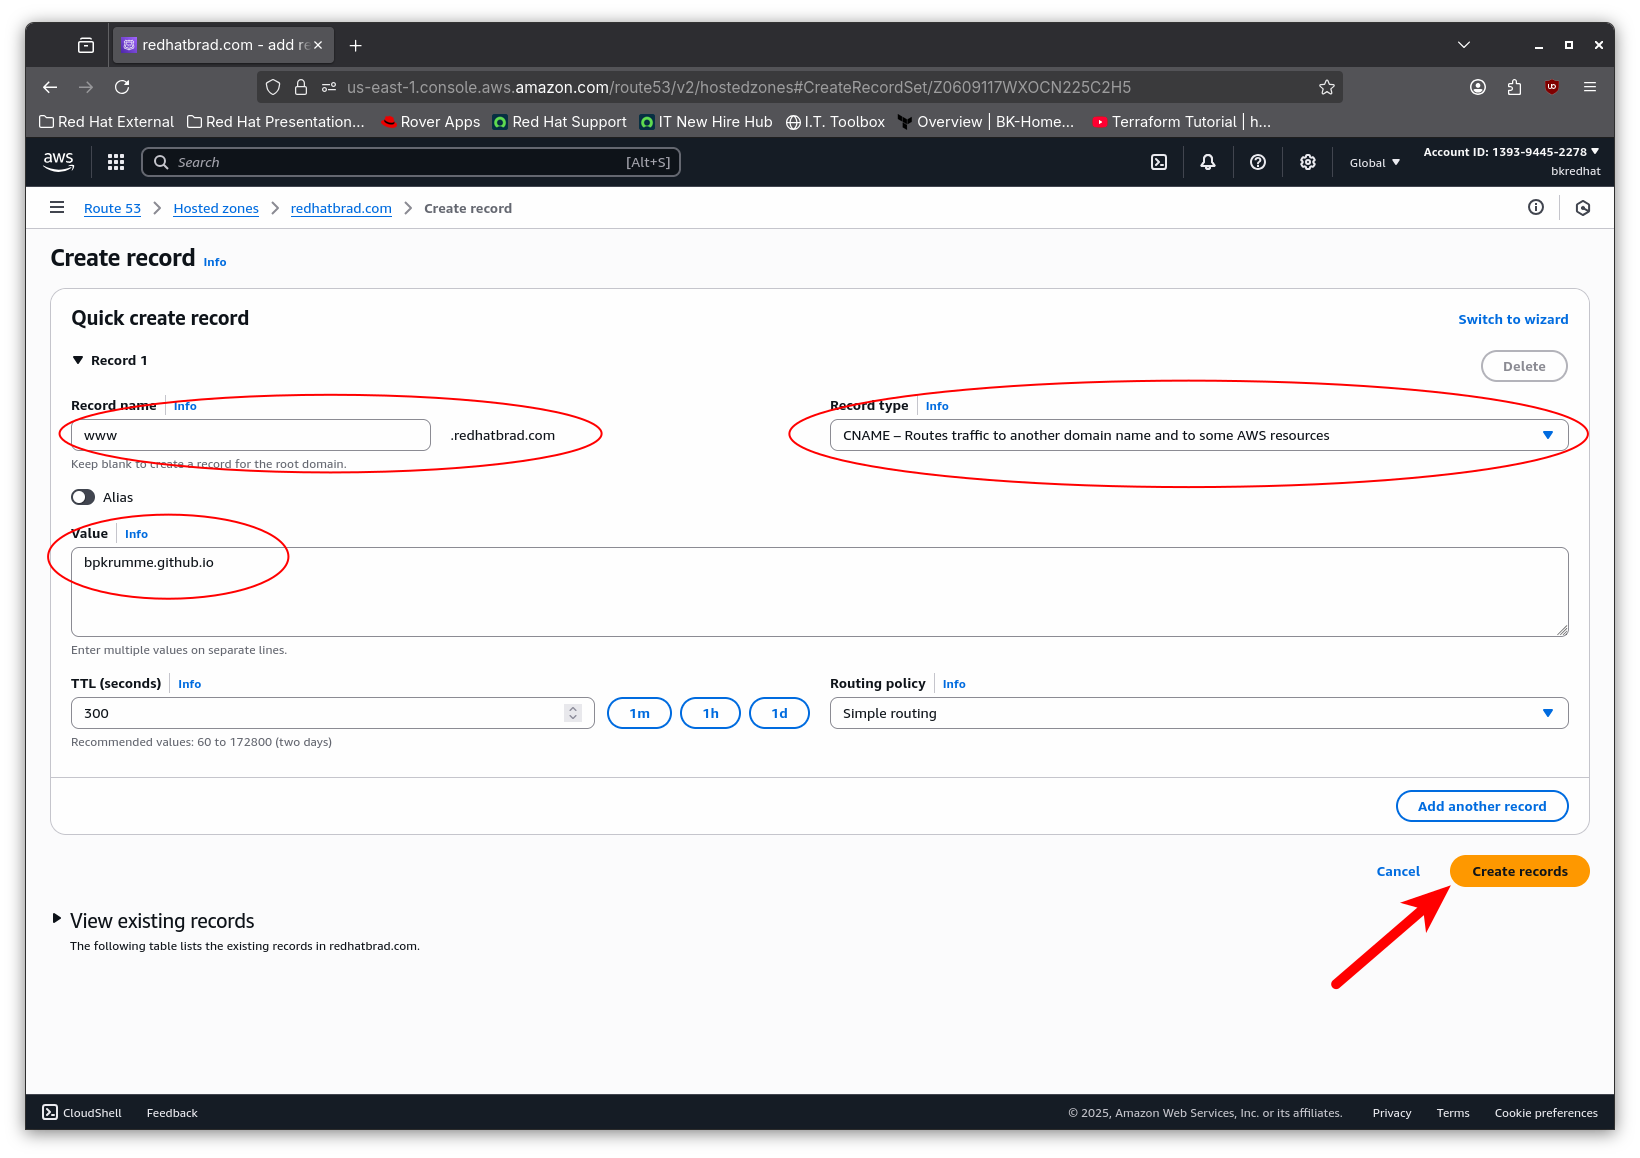
Back in Route 53, we need to add another DNS record. This time it will be a CNAME record. CNAME or Canonical Name records act as aliases, mapping one domain to another. To create the CNAME record, use the same procedure as before, but instead:
- Enter www for the Record name
- Select the CNAME Record type
- Enter **
.github.io** as the **Value** - Click the Create record button
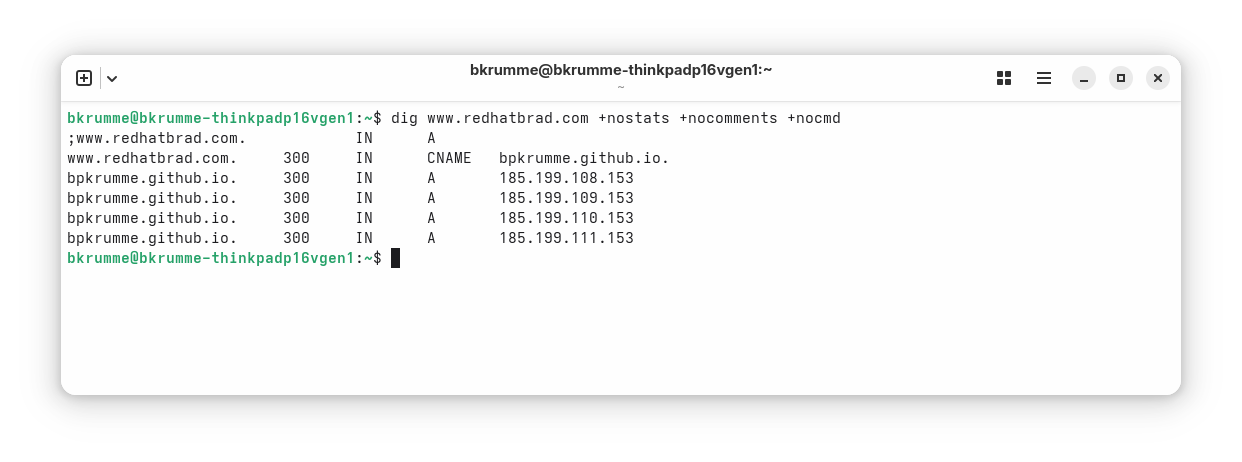
As before, we need to ensure this DNS record propagates. We can use a similar command as before to check for the record.
dig <CNAME record FQDN> +nostats +nocomments +nocmd
This should provide a result which looks similar to this:
Part 5: Configure the GitHub Pages repository to use a custom domain
At this point all of our DNS records are created and our domain is verified with GitHub. There isn’t anything else to do in Route 53. The last thing to do is configure our GitHub Pages repository to use our custom subdomain we just added to Route 53.
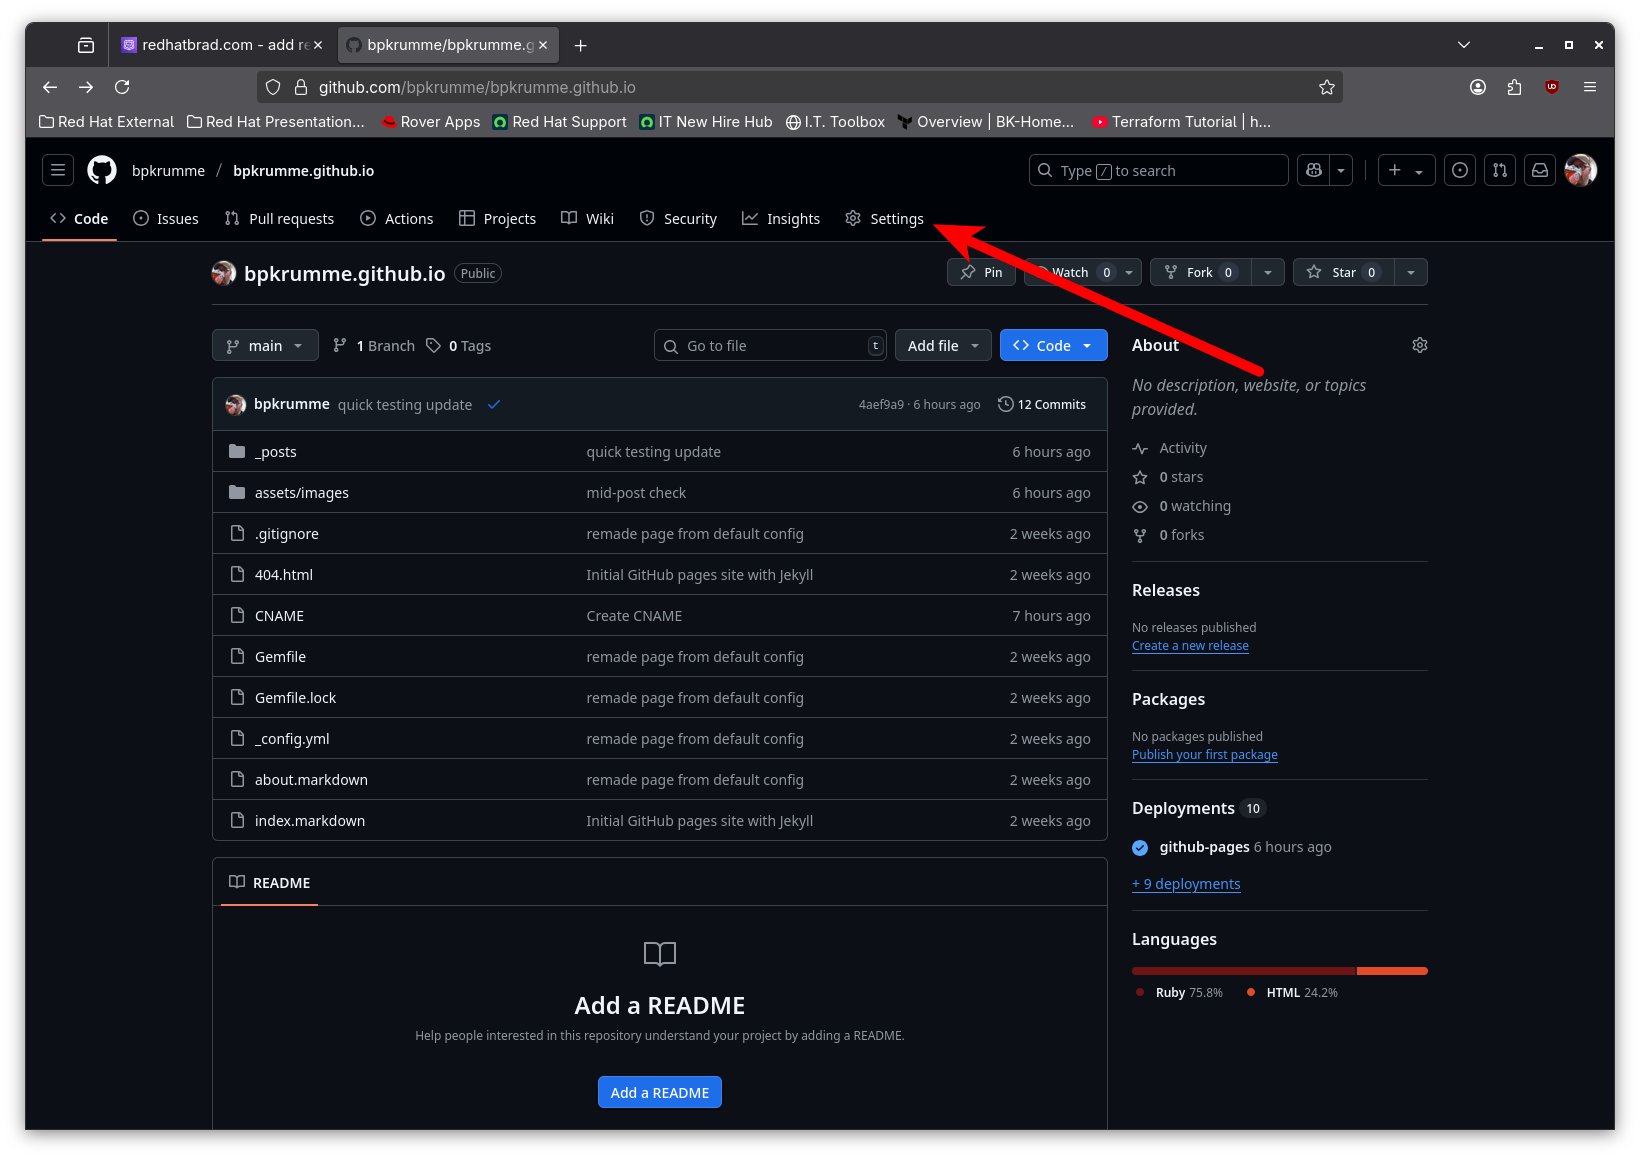
In GitHub, navigate to your GitHub pages repository. It should be named **
Once on the repository page, click the Settings link for the repo.
Then click on the Pages item under Code and automation
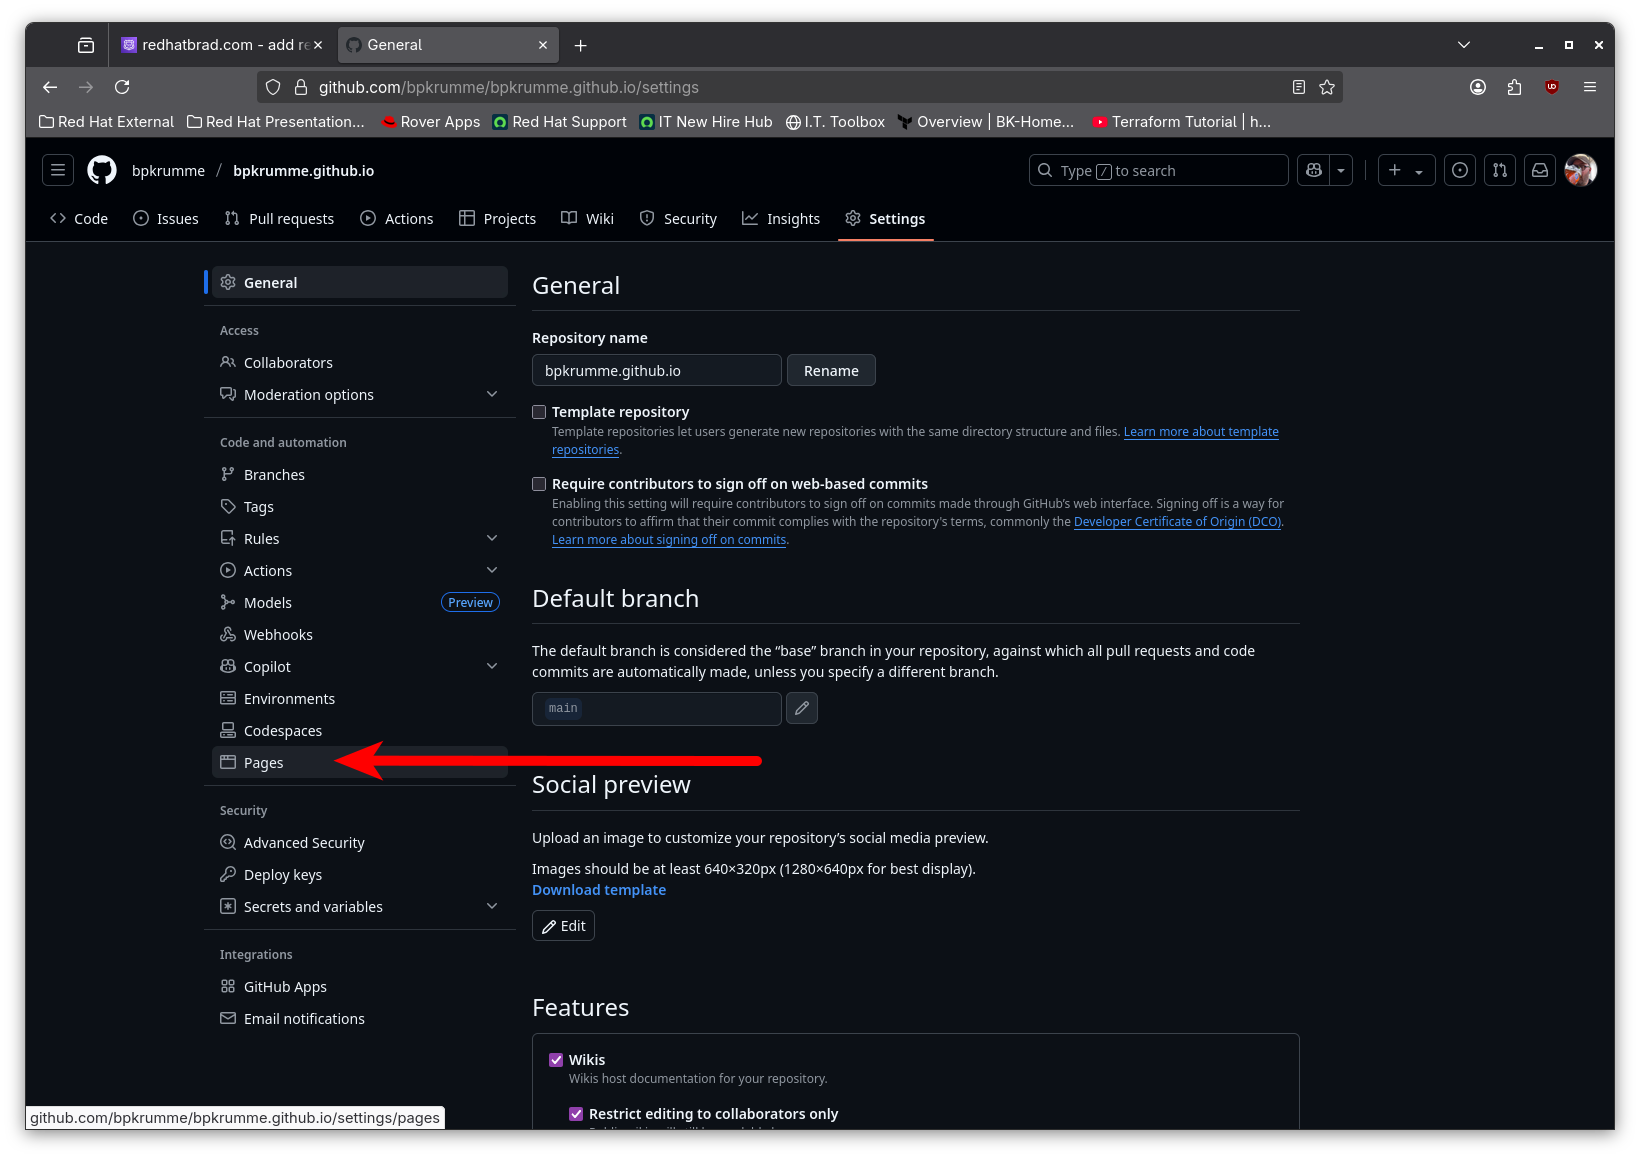
And finally, enter the custom subdomain we configured into the Custom domain box and click the Save button.
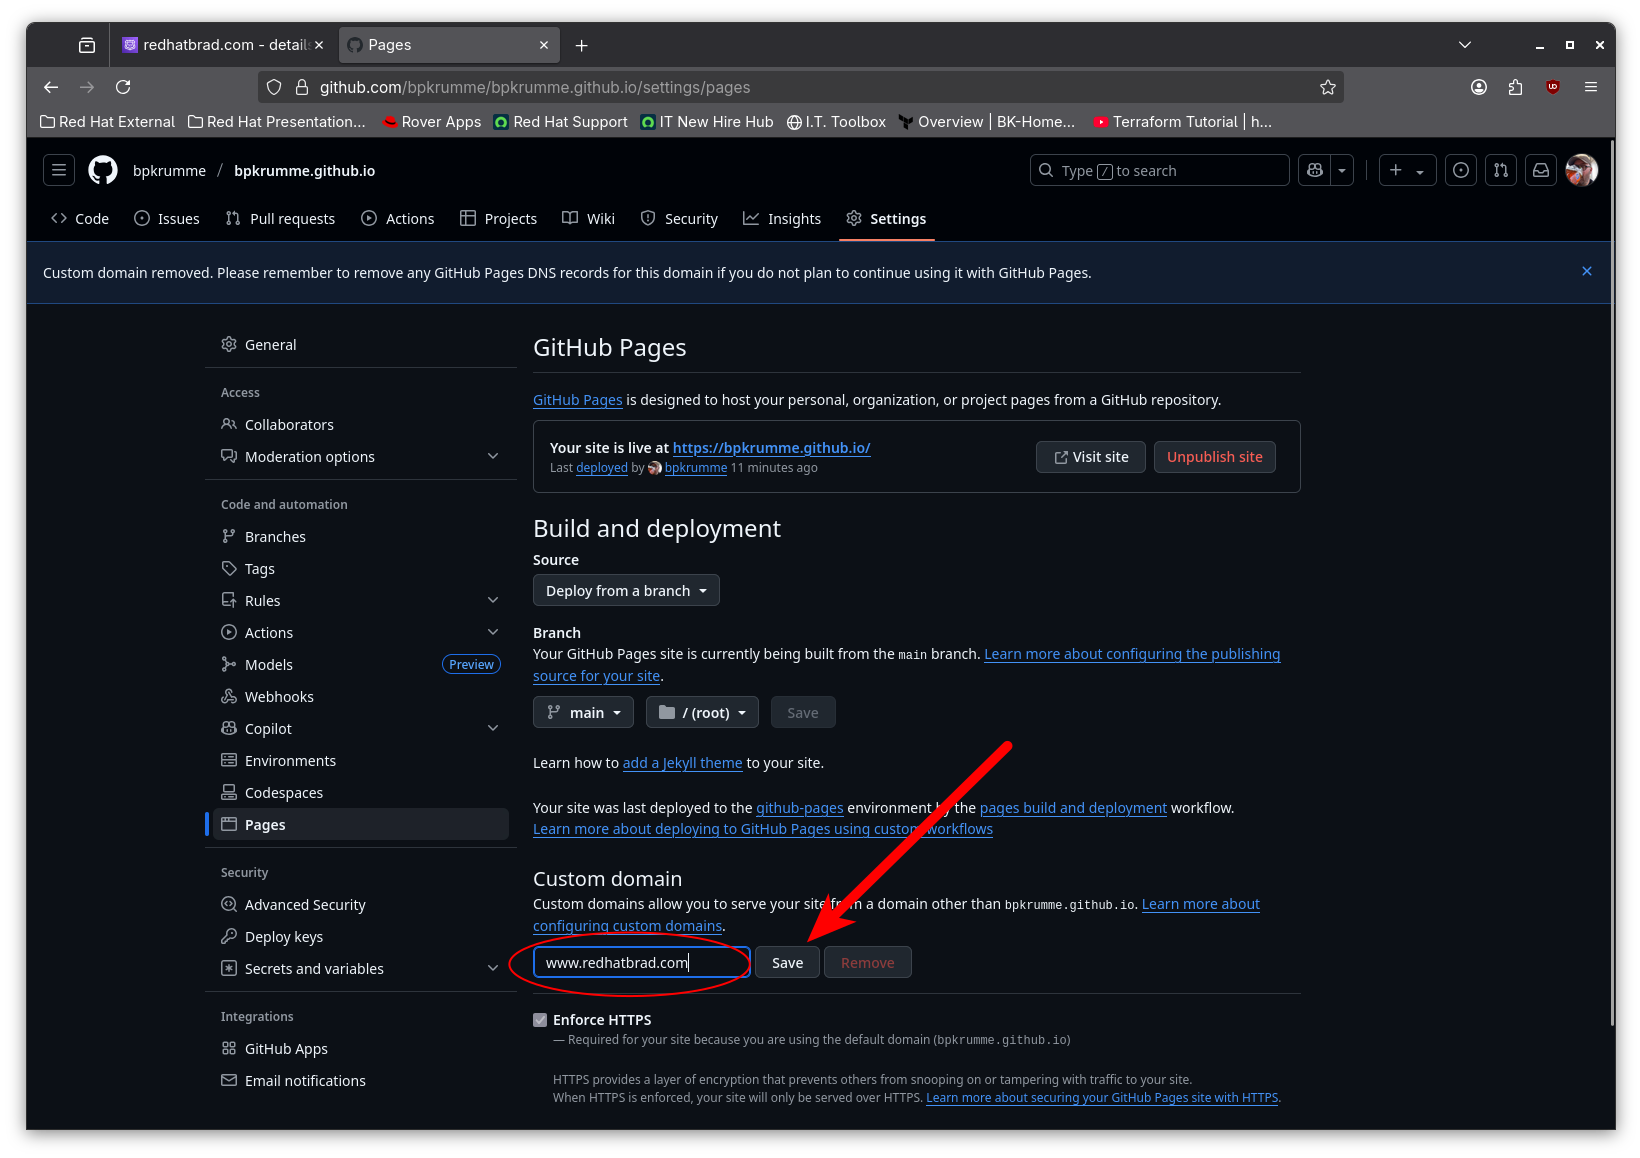
Github will do some validation of DNS. Once that is complete, you will be able to check the Enforce HTTPS checkbox, which is highly recommended.
Until next time!
–Brad